Raised Beds make for much easier year round gardening as you don't need to walk on the ground.
Raised beds are generally narrow so that you can reach across (mine are 4' / 1200mm wide which is a common size). You can then plant them up in short rows as and when to provide a succession of crops, I tend to plant similar crops in each bed but then swap things around each year.
You can buy ready made from various suppliers or make your own which is what I have done.
They don't need to be anything fancy, often old scaffold boards are used and they don't have to be large - start off small and add more as things progress ?
Construction
My Raised Beds are a nominal 4' by 8' (1200 x 2400mm) so easy to reach across from the paths.
The first beds where made using 6" (150mm) wide fencing gravel boards with offcuts of fence posts for joining the corners, these worked well for a few years but the timber eventually rotted even though supposedly treated. I persisted with them for a few more years replacing rotten planks when required but eventually had to replace them.
The new beds are made from 2" thick timber which I bought from UKSleepers who are based in Corby but used to have a branch in Hartwell within K.G.Smith's yard so I was able to pick up a few boards at a time on the way back from work in Milton Keynes.
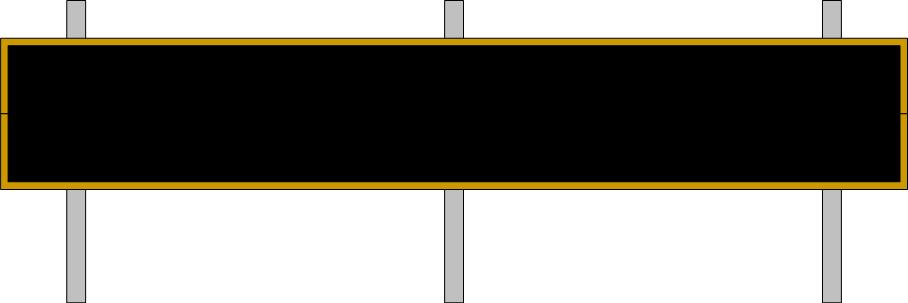
Each bed requires six 200x50mm boards, two are cut in half for the ends. I then used offcuts of fence post cut to around 24" (600mm) for the corners and some 24" (600mm) lengths of roof batten for intermediate 'legs' to stop the sides bulging. I have lined the inside of the beds with Damp-Proof Course which you can buy in rolls of various widths from e.g. Screwfix.
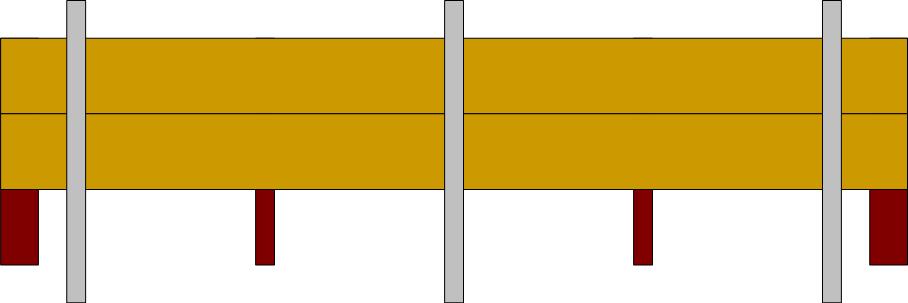
The beds are constructed on a flat surface e.g. a Patio, starting with the long sides. I used Sash Cramps to hold the two boards together, the cramps are laid out first with the boards clamped on top then you can staple on a length of Damp-Proof Course. The Damp Proof Course runs to the edges of the boards, I've left a gap in the drawing so you can see what's going on.
The whole lot is then flipped over and the Fence Posts and Roof Battens slid underneath, you'll need to support the Fence Battens with some offcuts. Then I used screws to fix everything together from the top (which will become the outside), you could use nails but from previous experience when it comes to replacing rotten timber in the future screws are much easier to remove !
When you've built two sides stand them on their legs and attach the end pieces remembering to fit the Damp-Proof Course.
I then cleared the land where they are going to sit and dug eight holes for the 'legs', then with an assistant (friendly neighbour or partner !) you can carry the bed to its new home and drop it into the holes. I have left the beds just slightly below ground level to stop the soil leaking out but so that the timber is as much as possible out of the ground. Level up and fill with soil and organic matter - you don't need to fill to the top, the idea is to leave room to top up with more organic material every year.
The beds are finished off with a square offcut of decking to top each corner post.